ESP8266 Lua/NodeMCU module for MH-Z19 CO₂ sensor
esp8266-nodemcu-mh-z19 provides an ESP8266 NodeMCU Lua module (mh-z19.lua)
as well as MQTT / HomeAssistant / InfluxDB gateway application example
(init.lua) for MH-Z19 carbon dioxide (CO₂) sensors connected via UART.
Dependencies
mh-z19.lua has been tested with Lua 5.1 on NodeMCU firmware 3.0.1 (Release 202112300746, integer build). It requires the following modules.
- struct
Most practical applications (such as the example in init.lua) also need the following modules.
- gpio
- mqtt
- node
- softuart
- tmr
- wifi
Setup
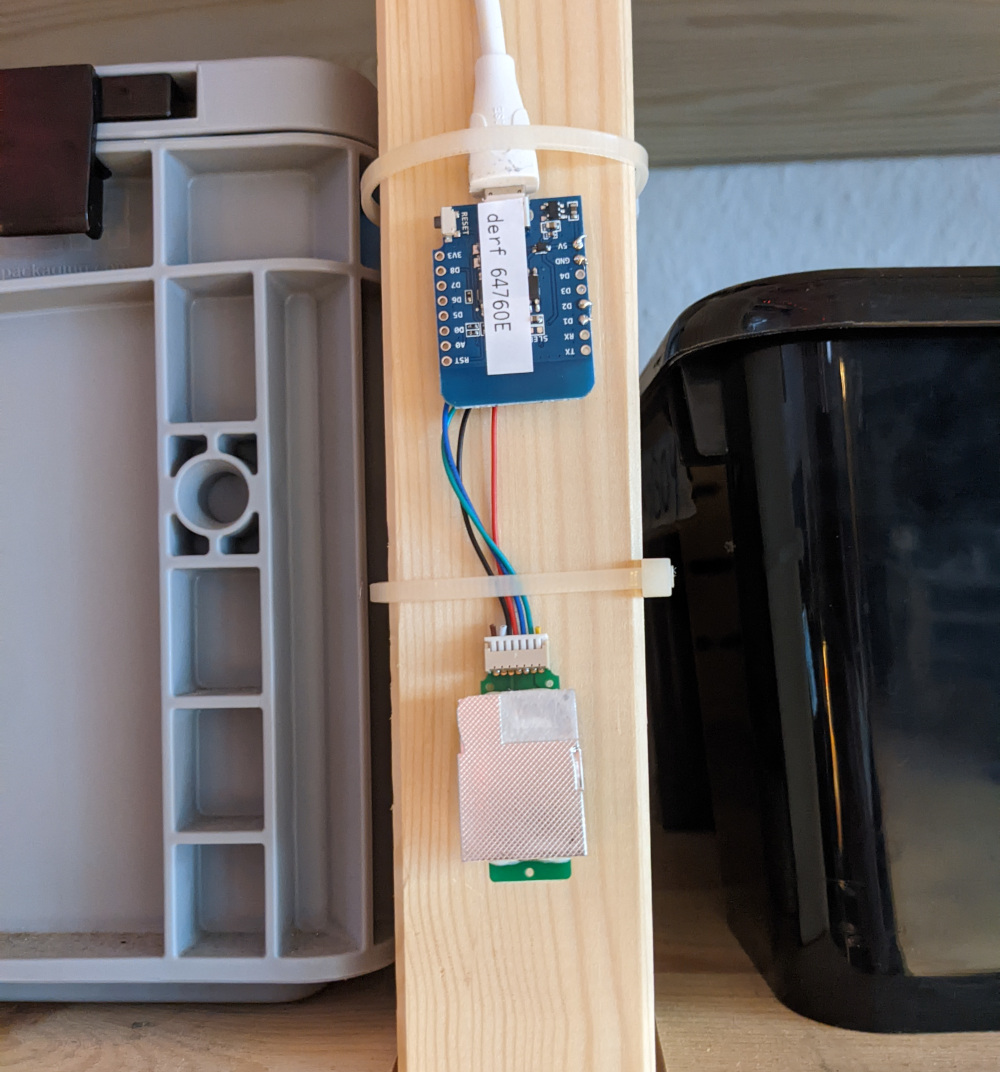
Connect the MH-Z19 sensor to your ESP8266/NodeMCU board as follows.
- MH-Z19 GND (black wire) → ESP8266/NodeMCU GND
- MH-Z19 Vin (red wire) → ESP8266/NodeMCU 5V
- MH-Z19 Rx (blue wire) → NodeMCU D1 (ESP8266 GPIO5)
- MH-Z19 Tx (green wire) → NodeMCU D2 (ESP8266 GPIO4)
If you use different pins for TXD and RXD, you need to adjust the softuart.setup call in the examples provided in this repository to reflect those changes. Keep in mind that some ESP8266 pins must have well-defined logic levels at boot time and may therefore be unsuitable for MH-Z19 connection.
Usage
Copy mh-z19.lua to your NodeMCU board and set it up as follows.
mh_z19 = require("mh-z19")
port = softuart.setup(9600, 1, 2)
port:on("data", 9, uart_callback)
function uart_callback(data)
if mh_z19.parse_frame(data) then
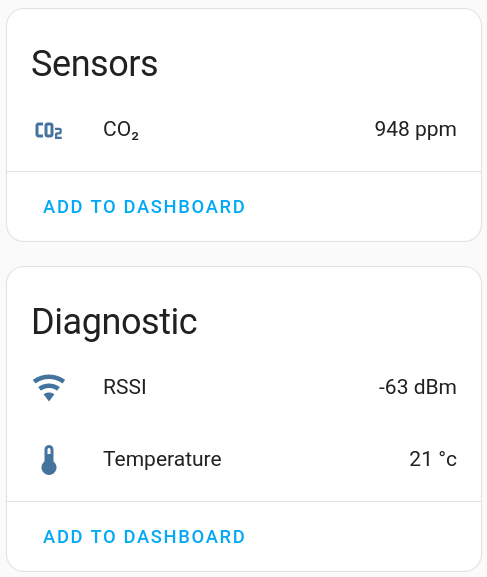
-- mh_z19.co2 : CO₂ concentration [ppm]
-- mh_z19.temp : device temperature [°c]
-- mh_z19.abc_ticks : ticks since last Automatic Baseline Correction
-- mh_z19.abc_count : number of Automatic Baseline Corrections performed since power-on
end
end
port:write(mhz19.c_query)
The sensor performs a CO₂ measurement every one to five seconds, depending on hardware revision.
Application Example
init.lua is an example application with HomeAssistant integration. To use it, you need to create a config.lua file with WiFI and MQTT settings:
station_cfg = {ssid = "...", pwd = "..."}
mqtt_host = "..."
Optionally, it can also publish readings to InfluxDB. To do so, configure URL and attribute:
influx_url = "..."
influx_attr = "..."
Readings will be stored as mh_z19[influx_attr] co2_ppm=%d,temperature_celsius=%d,abc_ticks=%d,abc_count=%d.
So, unless influx_attr = '', it must start with a comma, e.g. influx_attr = ',device=' .. device_id.